lunes, 30 de enero de 2012

THENKUZHAL | MURUKKU - STEP BY STEP RECIPE


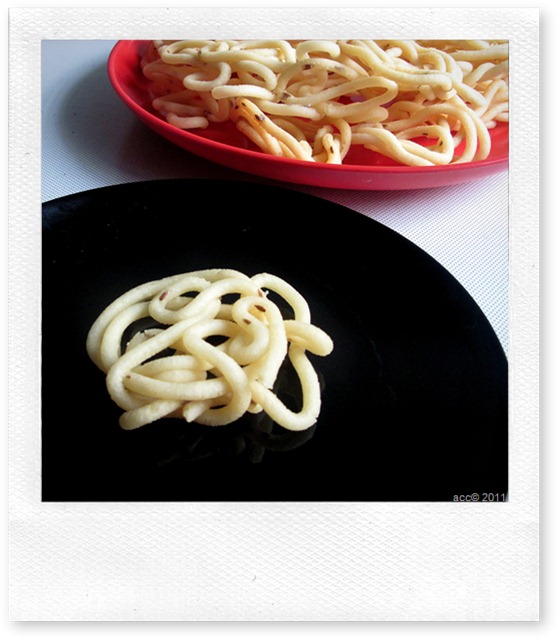
THENKUZHAL

Mostly we all make thenkuzhal for diwali or some special occasions. I love this murukku since my childhood days.I used to do all the pre preparatory works like buying rice and dal , grinding it in flour mill etc..I sit with my mom & paati when they make this for diwali especially for the last batch of murukku .. She makes half cooked murukku( we call it "arai vekkaadu" in tamil) . I love this murukku more than the crispy ones. I eat it hot immediately after taking out from the oil.Even today , my MIL made this specially for me..How sweet !!In love .I saw so many thenkuzhal recipes in web with different proportions of rice and urad dal . I want to share my version.I tried to take step by step pics for beginners. I really admire our fellow bloggers who blog recipes with step by step pics for each and every post. They have so much of patience and skill to do this. I really don't have both Winking smile.For sweets and savouries step by step presentation is most essential i feel. Hope this post helps beginners. Feel free to leave ur comments about my presentation.I will improve in my further posts. Now coming to my version..

INGREDIENTS

  • Raw rice / Maavu arisi – 1 kg or  5 cups
  • Round white urad dal – 3/4 cup
  • Fried gram dal / pottukadalai – 1 handful
  • Butter – 4 tbsp or 100 gms
  • Asafetida / hing – 1/2 tsp
  • Jeera / cumin seeds or Black sesame seeds – 2 tbsp
  • Salt & water – As needed.
  • Cooking oil – for deep frying..

"""PLEASE HAVE A LOOK AT THE "POINTS TO REMEMBER" BEFORE STARTING.."""

METHOD

  1. Heat a kadai and dry roast urad dal slightly without changing its colour. Roast till nice aroma comes from urad dal. Switch off the flame and add the fried gram dal.
  2. Now mix the rice, roasted urad dal and fried gram dal.
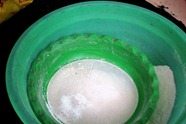
  3. Grind in flour mill or powder it in mixie. If u use mixie to grind the mixture, please don't forget to sieve the flour. Flour should be very fine in texture.

sieve

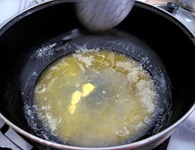
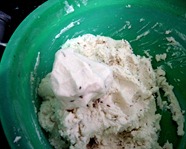
  1. Add salt , melted butter, hing , jeera or sesame seeds and water to make a non sticky dough.

melted buttermurukku dough

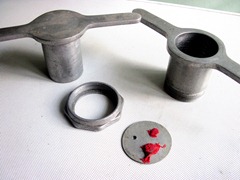
Take the murukku press and mould with one whole.

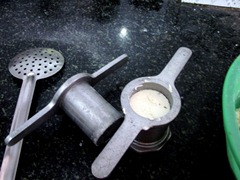
achudough in achu

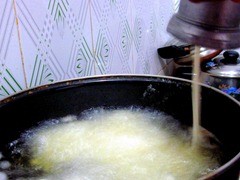
Fill the dough and set aside.Heat the oil in a broad kadai and and press the murukku in circular motion directly in oil or press the murukku in a polythene sheet or in the back of ladle separately and then drop in hot oil. This way u get a nice shape. After u press the murukku , please stand a few feet away from the kadai.Sometimes , very rarely murukku may burst like seedai . If it doesn't burst, then proceed.

pressing murukku

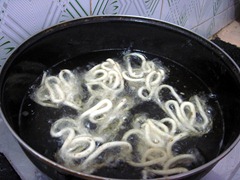
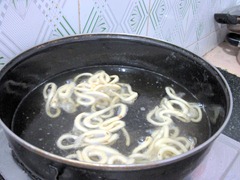
Cook for sometime.Flip and cook for some more time till the hiss sound and bubbles ceases .

Do it in medium flame.Adjust the flame whenever needed.

cookingsound ceased

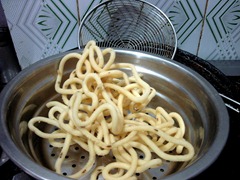
Remove and drain in a paper towel..Store in an air tight container after it cools down.

murukku in colander

Don't forget to try the half cooked murukku in the last batch.

For this after u drop the murukku in oil , just flip immediately and remove in 10 secs.. Eat it hot !!

White colored , crispy thenkuzhal is ready to enjoy !!

COLLAGE

Points to remember

  • When u make murukku in large quantities , make the dough in batches to avoid the dough from drying.Also cover the dough with a damp cloth or a lid while cooking murukku. This helps in getting white colored murukku for all the batches. Otherwise color may vary for the last batches.
  • We have added fried gram dal and butter to get the crispness & white color . But usually fried gram dal is not added in thenkuzhal.Its purely optional.
  • Adding too much of butter makes the murukku look oily and becomes soggy very soon.Shelf life gets reduced.
  • Adding more urad dal flour or too much of roasting the urad dal results in dark colored murukku.So make sure u roast the urad dal without changing the color..
  • If u use store bought rice flour and urad dal flour , the ratio would be 6:1.No need to roast the urad dal flour if it is ready made.
  • The murukku flour should be very fine in texture otherwise it may burst while cooking. So i always sieve the flour for safer side Winking smile
  • Use enough oil for deep frying. Add more oil after few batches if necessary.
  • Drop or press the murukku only when the oil becomes hot. U can find this by dropping a pinch of flour. It raises up quickly.This is the correct heating point. Do not let the oil fume. Always keep the flame in medium for even cooking.
  • Instead of pressing in oil directly , u can try pressing it in the back of ladle greased with oil or greased polythene sheets. This way u'll get nice shape.. 
  • After cooking when u break the murukku , u can c a hole in the middle of the murukku like  funnel. This denotes the murukku is perfect !!

hole in murukku

Can u see the hole  Winking smile. Catch u in my next post. Bye. Have a gr8 weekend Smile


domingo, 29 de enero de 2012

All about Scones Part 2 - Making scones in the U.S.

Sarabeth's Bakery Currant Scones with homemade strawberry jam
In part 1,  my friend, Ann, and I tasted scones at Brown's Hotel, in London, and then made them with some friends in an English kitchen.  When I got home, I wanted to see how well the recipe would work with American ingredients and equipment.  I wasn't surprised to find that the recipe did not work well, as Ann had told me that she hadn't had much luck using her American recipes in Britain.  Most likely, the recipe didn't work well because the flour is different, but the butter and milk might have contributed too.  I was a little surprised that the scones didn't brown in my oven at home, but then the temperature that Brown's scones cooks at is much lower than any other recipes I've seen, both English and American. 


For my first try, I used my everyday flour, King Arthur unbleached all-purpose flour.  I found that the dough was so dry that I had to add an extra 2-3 tablespoons of milk to even get it to come together.  For the second attempt, I used Pillsbury bleached all-purpose flour, which has less protein in it than the King Arthur flour.  I did find that switching to this flour worked better.  At least I didn't have to add so much extra liquid to get the dough to the proper texture. However, the scones rose much higher than Brown's scones, and because of this they didn't look as pretty (bleached flour is probably the cause of this).  I also think I overkneaded this batch of dough in an effort to get the dough 'smooth', an instruction in Chef Ecuvillon's recipe (which I didn't do in London).  Although they weren't tough, they didn't have the delicate texture found in the original Brown's scone.  If I made these scones again, I would probably try them with biscuit flour (White Lily, Southern Biscuit, or King Arthur Perfect Pastry Flour), and would knead them lightly, as I had done in London.

For my next experiment  I tried  America's Test Kitchen Dreamy Cream Scones.  This recipe is very similar to the Brown's recipe except that the butter doesn't get cut in as finely, it has more baking powder and cream instead of milk.  The disadvantage to having more baking powder is that the scones rise higher and don't look as pretty.  The texture is quite different because of the handling of the butter and the larger amount of baking powder.  These were delicious but tasted more like ordinary biscuits, rather than th emore exotic scone!

Next, I tried Sarabeth's Bakery Currant Scones.  These are extremely different from the two above, because they contain eggs and they have very little sugar in them.  They were quite flaky and they cooked perfectly, with the oven starting out very hot, and then being reduced when the scones were in.  The only problem with these was that they weren't sweet enough to suit my husband.


The last batch that I made, was from the Joy of Cooking.  I made their classic scones, but instead of  using egg I used double the amount of cream (as per variation in the Joy).   This was the scone that we liked the most.  These were the flakiest of all, crusty on the outside, yet moist within, and sweet enough to suit my husband's tastes.  You'll see that they're not as shiny as Sarabeth's because the glaze is just a light brushing of cream, rather than the shine of an egg.  Although they're not as pretty, we liked the taste of the crust better without the egg wash. 

For the original Joy of Cooking recipe, please see The All New Joy of Cooking Classic Currant Scones.  The recipe below has been slightly altered by me. Brown's Hotel Scones (adjusted for American kitchens) follows.  For Sarabeth's, go to http://www.epicurious.com/ and look for the recipe that was printed in Gourmet Magazine in 2010.

The All New Joy of Cooking Classic Currant Scones, edited by Penny Eisenberg
Makes 8 wedges or about 20 round scones

2 cups (260 grams) all-purpose flour, fluffed scooped and levelled
3-5 tablespoons sugar, to taste
2-1/2 teaspoons baking powder (can use up to 1 tablespoon)
1/2 teaspoon salt

6 tablespoons (3 ounces) unsalted butter, cold
1/2 cup dried currants or raisins

1 cup heavy cream + 1 tablespoon, divided, cold

Preheat the oven to 425 degrees F.  Line a baking sheet with parchment paper.
In a large bowl, whisk together the flour, sugar, baking powder and salt.

Either cut the butter into small pieces, or grate the butter on the large grate of a box cutter.


 Toss the butter into the flour mixture to separate the pieces.  If using cut butter (rather than grated) you will need to rub the butter into the flour with your fingertips or use a pastry blender to cut the butter in until the largest pieces are the size of peas, and the rest looks like breadcrumbs.  Work quickly and lightly. 

Stir in the currants or raisins.  Make a well in the flour mixture and pour in the cream, all at once.  Mix with a rubber spatula or wooden spoon until the dry ingredients are moistened.


 Knead the dough, lightly,  turning the dough and pressing it  until everything adheres together.  Gently roll the dough into an 8-inch round, about 3/4-inch thick.


Cut the dough into 8 wedges, or cut out rounds with a 2t o 2-1/2-inch floured biscuit cutter.  Place the scones on the parchment paper, at least 1/2-inch apart. Brush the tops of the scones with cream.  If desired sprinkle with coarse sugar.  Place in the oven and immediately reduce the oven temperature to 400 degrees. F.  Bake for 12-15 minutes until golden.  Let cool on a rack, and serve slightly warm or at room temperature.


Brown's Hotel Scones adapted for the American Kitchen
Makes 16 wedges or 20 small round scones

4 cups minus 2 tablespoons (500 grams) lower-protein all-purpose (such as Pillsbury or Gold Medal), fluffed, scooped and levelled (if using biscuit flour, you might need 1/4-1/3 cup more flour)
4 teaspoons baking powder
1/4 teaspoon salt
7 tablespoons unsalted butter, cold
1/2 cup sugar
1/4 cup raisins or sultanas
1 cup whole milk + 2 tablespoons, divided

For egg wash
2 large egg yolks
1 tablespoon whole milk
pinch sugar

In a large bowl, whisk together the flour, baking powder and salt.   Either dice the butter, or grate it on a box grater (see above).  Add the butter to the flour mixture, and using your fingertips, rub the butter into the flour until it is no longer visible. Stir in the sugar.

Toss the sultanas into the above mixture. Make a well in the mixture and pour in all of the milk. Stir with a spoon until the mixture starts to come together.

Turn the mixture onto a lightly floured surface, and knead gently, 5 or 6 times, until it forms a smooth, soft dough (add a little more flour or milk to get the texture right). Form into a round, wrap in cling wrap and chill for 1 hour.

Preheat the oven to 400 degrees F.  Line two baking sheets with parchment paper. Roll the dough gently on a floured surface to about 1-inch. thick. Dip a 2-inch round cookie cutter into flour, and then cut out the rounds, dipping the cutter as needed. Press together scraps and re-cut. Place the rounds on the parchment paper.  Alternatively you can shape the dough into two 8-inch rounds and then cut each into 8 wedges.
Make the egg wash, by mixing the ingredients together in a small bowl. Brush the tops of the scones with the egg wash.

Bake for 8-10 minutes, until the scones are golden brown and look and feel cooked on the sides. Let the scones cool until just barely warm or completely cooled, and serve with fresh strawberry jam.  You probably won't be able to make Clotted Cream because you need  unpasteurized or lightly pasteurized cream to make it, but you might be able to find jarred Devonshire Cream in a specialty food store.

sábado, 28 de enero de 2012

100 Perfect Pairings Main Dishes to Enjoy with Wines You Love

Developing new and enticing recipes that will bring out the best in a variety of wines is a challenge I relish. I have a huge collection of food and wine pairing books, not only because I am fascinated by it but also because for several years I developed recipes for MyWinesDirect, an online wine retailer. Coming up with new recipes to go with yet another Cabernet or Chardonnay required not only creativity but also a deeper understanding of how food and wine interact.

100 Perfect PairingsI have only written about a few of the books in my wine pairing collection because frankly, not very many of them are worth telling you about. The bible is of course What To Drink with What You Eat. It's where I go first for inspiration. But I also love the 100 Perfect Pairings books by Jill Silverman Hough. The first was 100 Perfect Pairings Small Plates to Enjoy with Wines You Love and the second out now is 100 Perfect Pairings Main Dishes to Enjoy with Wines You Love. She not only provides recipes, but really digs into how to pair and the tricks to making matches that sing.

The format of the two 100 Perfect Pairings books are the same, as is the general overview information about each wine. Each chapter features a different wine, and dishes that pair well with it. There are six white wines and six red wines (ok one is rose). They are the most common wine varieties you're likely to find. While the first book focused on small plates, the second in the series is all about main dishes. Each recipe has a tip, some insight into what makes it a good dish or a good pairing or even suggestions for how to round out the meal. On my list to try: Buttermilk Oven-Fried Chicken with Garlicky Ranch Sauce with Viognier, Chicken 'Cocoa' Vin with Merlot, and Steak and Radicchio Caesar with Cabernet Sauvignon. If you are new at pairing food and wine or do it all the time, these books will be welcome additions to your cookbook collection since they function as reference books too. Jill Silverman Hough makes pairing food and wine easy and fun.

domingo, 22 de enero de 2012

Is Hunger a Taboo Subject?

Cabbage from the San Francisco Food Bank
Hunger ChallengeThe first year I participated in the Hunger Challenge, one of my commenters basically said that anyone who was hungry in this country was lazy. I was also told by a blogger that she wouldn't participate in the Challenge because it was her personal goal to support organic farmers and the Hunger Challenge just encouraged support of an already broken food system. In subsequent years I have heard that hunger is a bigger issue in other parts of the world, and that childhood obesity is the real problem we should be focused on.

The goal of the Hunger Campaign is to raise awareness about hunger in the San Francisco Bay Area. Participants in the Challenge live on the same budget a food stamp recipient would receive, a paltry $4.72 a day. But somehow, I find many people I tell about the Challenge don't want to hear about that. They'd rather focus on something else. All those other issues - politics, sustainable food systems, organics, world hunger and even childhood obesity get way more attention in the media than local hunger. Yes. I said local hunger.

Here in San Francisco, according to the San Francisco Food Bank, 197,000 people struggle to feed themselves and their families. In Marin, just over 40,000 people - or 16% of the population - face the same problem. 
I find it shocking that in a community as rich as ours (San Francisco and Marin), 237,000 people live at or below 185% of the federal poverty line ($33,873 per year for a family of three). While children or families may be eligible for aid at that level, even with assistance it can be very challenging to provide enough food to consistently nourish themselves.

Won't you think about what you can do help alleviate hunger in your community?

GET INVOLVED!

♥ Take the Hunger Challenge yourself. Sign up here.

♥ Read blogs by people taking the Hunger Challenge. There's a blogroll here.

♥ Follow the Hunger Challengers on Twitter. There's a listing here, or search for the hashtag #HungerChallenge.

♥ Learn more about the San Francisco Food Bank - and make a donation. For every $1 donated the food bank can supply hungry people with $6 worth of food!

♥ Follow the San Francisco Food Bank on Twitter or visit their Facebook page to see how they're fighting hunger every day.

sábado, 21 de enero de 2012

California Olive Ranch Extra Virgin Olive Oil

California Olive Ranch
California is producing some very good extra virgin olive oil, some using old European varieties of olives, harvested the old fashioned way, and--some high quality extra virgin olive oil harvested in a very modern way, for a fraction of the price. So how is possible to get high quality extra virgin olive oil at a low price? Last week I visited California Olive Ranch, the largest California olive oil producer, and learned just how they do it.

California Olive Ranch
It all comes down to freshness and quantity. California Olive Ranch plants three varieties, arbequina, arbosana from Spain and koroneiki from Greece. Their olive orchards look nothing like what you may have seen in Europe. The olive trees are pruned into a hedge shape that is harvested mechanically, using a harvester specially developed for shaking the trees to get the olives off without damaging them. Less damage means better quality oil.

Here are some numbers for California Olive Ranch:

Their olive trees grow 6-8 feet high

Trees are planted 5 feet apart

There is 13 feet between each row

There are about 675 trees planted per acre

Each tree yields 7-12 pounds of olives

Only 20% of the olive is oil, 55% is water

12 harvesters run 24 hours a day during harvest season

5,000 acres are owned by the company

5,000 acres are managed by 67 farmers who have long term leases

Each truck holds 66,000 pounds of olives

Each truck is unloaded in 35 minutes

California Olive Ranch
Some more facts:

The tree trimmings are mulched

The ground pits and olives, called pomace, is fed to cattle

California Olive Ranch is using bird boxes and buffer zones to minimize the use of pesticides and tests each batch of olives, and has test plots for organic olives

California Olive Ranch
If you ever get a chance to ride a harvester and see the olives jiggle off the trees I highly recommend it! That I got to share the experience with blogging friends Chef John from Food Wishes, Chrystal Baker from The Duo Dishes, Aleta Watson from The Skillet Chronicles, and Jane Bonacci from The Heritage Cook made it all the more sweet!

California Olive Ranch
Speaking of sweet, all exra virgin olive oil should be a balance of fruity, bitter and pungent. The best way to find your favorite, is to taste them...however...California Olive Ranch uses descriptors like intense and bold and mild to help you find one to your taste.

California Olive Ranch
* If you want the freshest olive oil, known as 'olio nuovo in Italy, sign up to buy California Olive Ranch's Limited Reserve.

* If you like a buttery mild oil without too much bite, look for their basic extra virgin olive oil

* If you like a fruitier variety, try the Arbequina

* The Arbosana is most complex

* The Miller's blend is bold and balanced (and a favorite of some bloggers, food writers and chefs too.)

My thanks to California Olive Ranch for inviting me up to visit during harvest and letting me sample their fresh oils!